> For the complete documentation index, see [llms.txt](https://docs.booldesk.com/llms.txt). Markdown versions of documentation pages are available by appending `.md` to page URLs; this page is available as [Markdown](https://docs.booldesk.com/how-to-use-modules/change-management-module/how-to-create-a-change-request.md).
# How to create a change request
**Overview**
Change Requests are used to formally manage modifications to your IT infrastructure, such as server upgrades, network changes, or software deployments. Unlike regular tickets, changes follow a structured process focused on detailed planning and risk mitigation to minimize service disruption. This guide will walk you through creating a new change request.
#### **Step-by-Step Guide**
**1. Initiate the Change Request**
There are two common ways to start creating a new change request in BoolDesk.
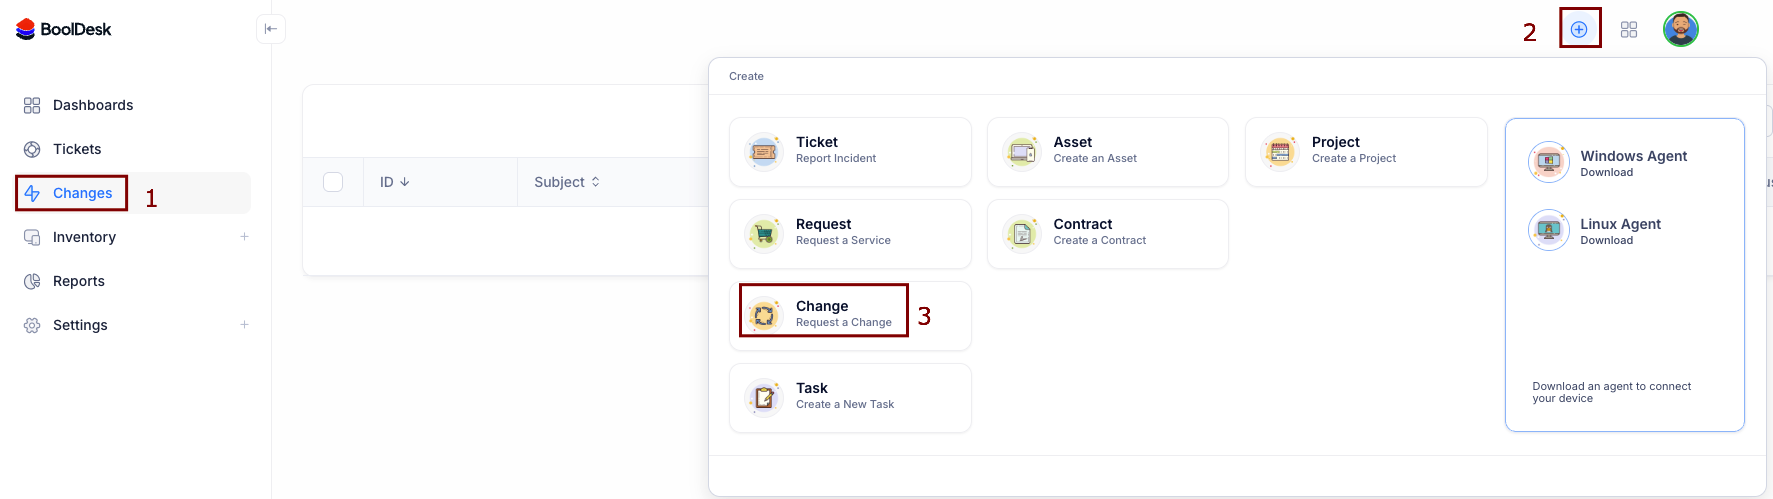
* **From the Changes Module (1):** Navigate to the Changes section in the main menu and click the button to create a new change.
* **Using the Quick Action Button (2 & 3):** For quick access from anywhere in the platform, click the plus icon (+) in the header and select Change from the menu.
**2. Define the Change Details**
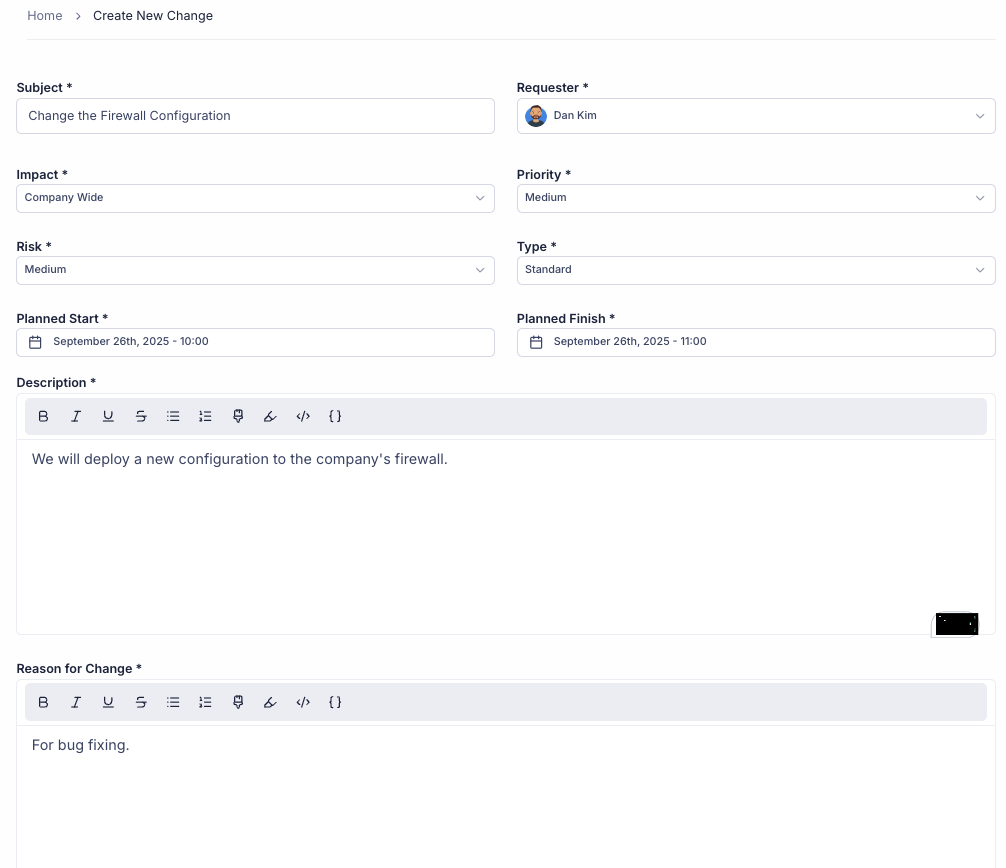
On the "Create New Change" form, start by filling in the high-level details to define the what, who, and when of the change.
* **Core Information:** Provide a clear `Subject`, select the `Requester`, and classify the change using the **Impact, Priority, Risk**, and **Type** fields.
* **Schedule:** Set the Planned Start and Planned Finish times to define the maintenance window. This example change is scheduled for today, September 26th, from 10:00 AM to 11:00 AM.
* **Justification:** Fill in the Description and Reason for Change fields to explain what you are doing and why it's necessary.
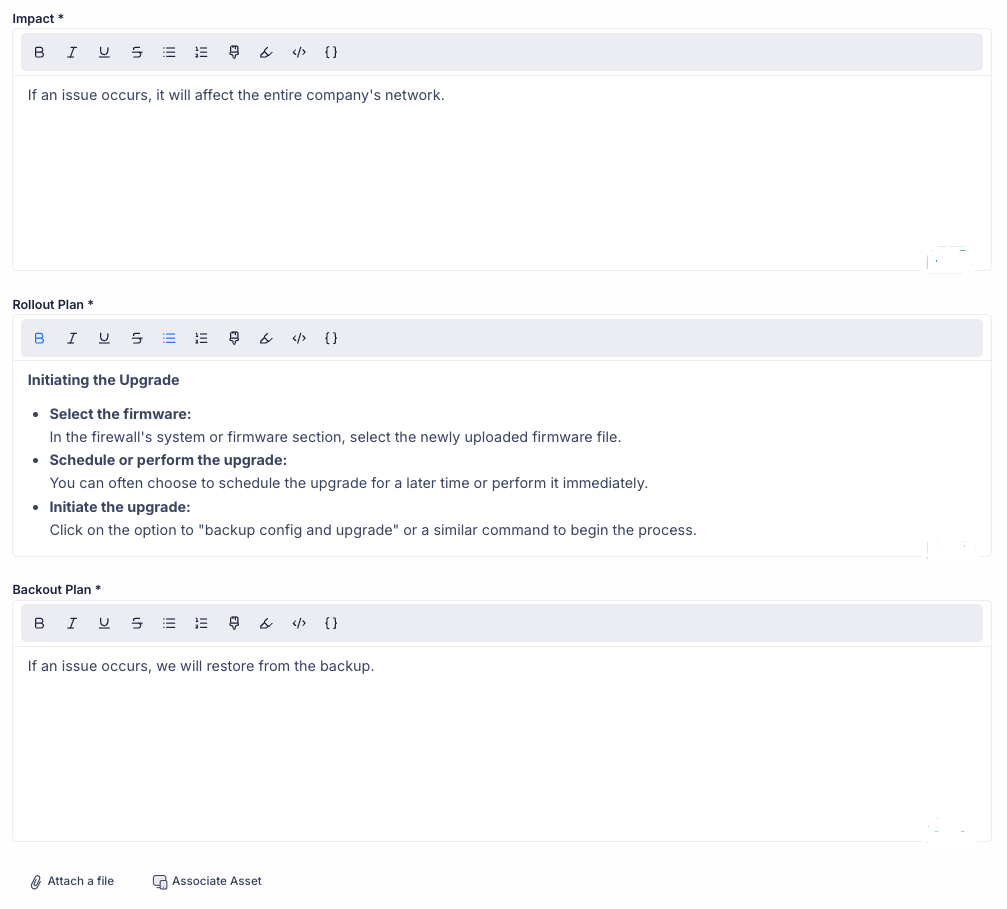
**3. Document the Implementation Plans**
The next sections are critical for ensuring the change is well-planned, successful, and reversible.
* **Impact Plan:** Detail the potential business and technical consequences if the change fails or causes an issue.
* **Rollout Plan:** Write a step-by-step guide for how the change will be implemented by the technical team.
* **Backout Plan:** Clearly define the procedure to undo the change and restore the system to its previous state if anything goes wrong.
**4. Submit for Approval**
After thoroughly filling out all sections of the form, click the button to save and submit the change request. It will now enter your organization's change management workflow, typically for review and approval by the Change Advisory Board (CAB) or other stakeholders before implementation.
#### **5. The Change Management Lifecycle**
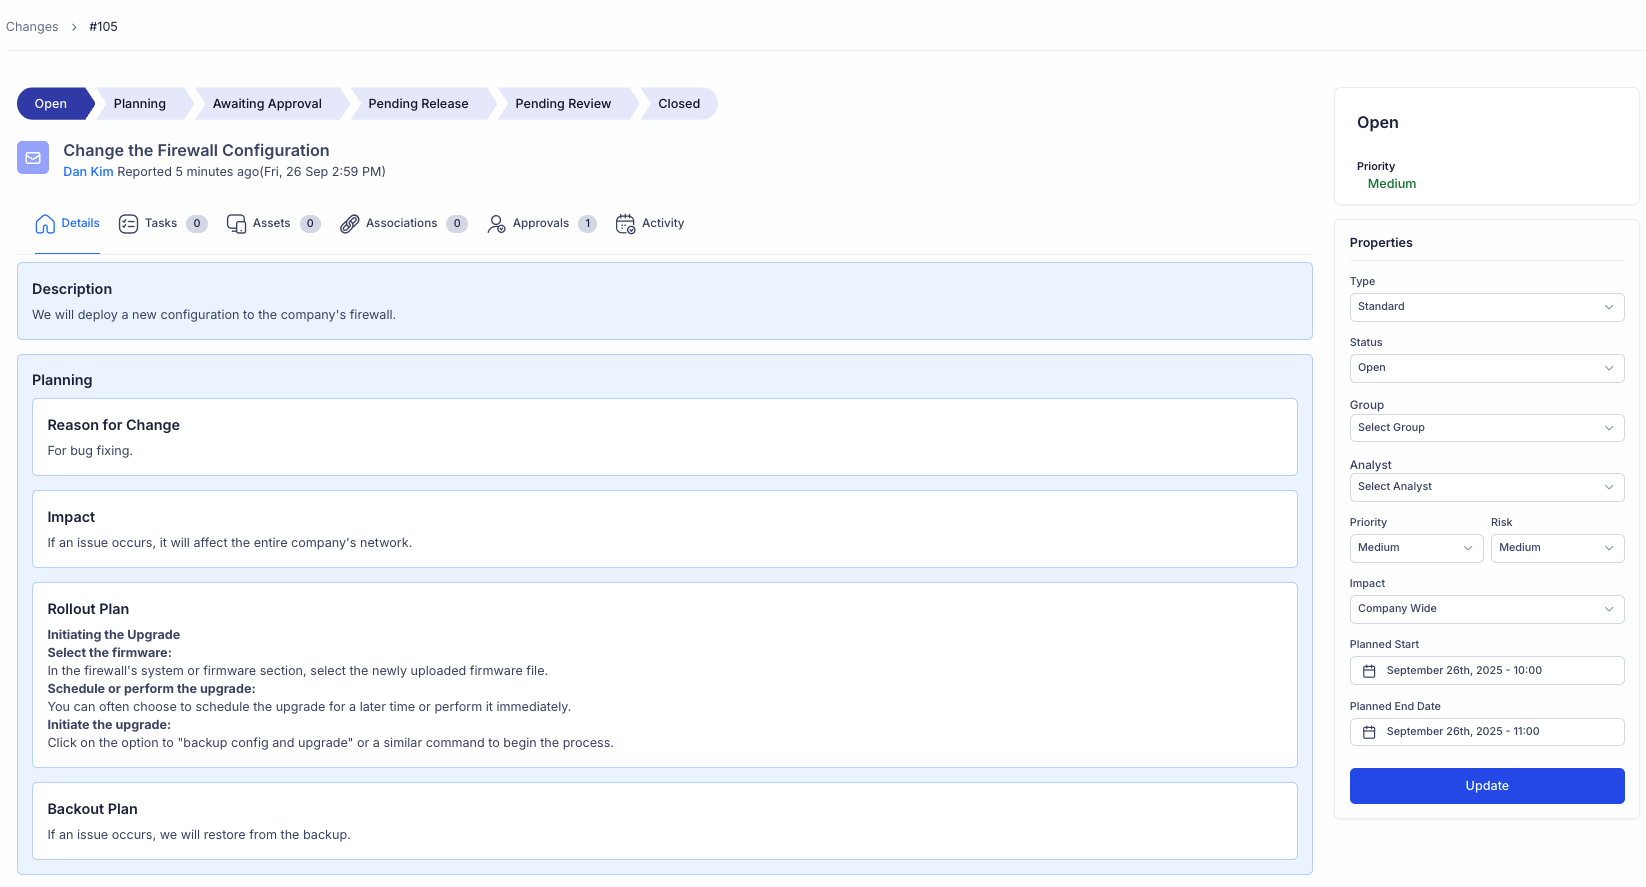
The tabs at the very top of the screen represent the typical journey of a change request from creation to completion.
* Open & Planning: This is the current phase. All the details you entered—like the reason, rollout, and backout plans—are documented here. This is where the change is prepared for review.
* Awaiting Approval: Once planning is complete, the change is moved to this stage. It's now waiting for review and approval from the Change Advisory Board (CAB) or a designated manager.
* Pending Release: The change has been approved! It's now scheduled and waiting for the planned start time to be implemented.
* Pending Review: The change has been implemented. This stage is for monitoring the system to ensure the change was successful and didn't cause any unforeseen issues.
* Closed: The review period is over, and the change is formally completed and closed.
#### **6. Properties and Scheduling**
The Properties panel on the right is your control center for managing the change's metadata and status.
* You can update the Status field to manually move the change through its lifecycle (e.g., from "Planning" to "Awaiting Approval").
* You can assign the change to a specific Group or Analyst to delegate responsibility.
* The Planned Start and Planned End dates are critical for scheduling and communicating the maintenance window to any affected users.